手写Promise(基础版)
面试官: 手写个Promise吧
我: ......
# 函数式写法
```js
function MyPromise(executor) {
var self = this;
self.status = 'pending'; // Promise状态,初始为pending
self.value = undefined; // Promise的值
self.reason = undefined; // Promise失败的原因
self.onResolvedCallbacks = []; // Promise resolve时的回调函数集合
self.onRejectedCallbacks = []; // Promise reject时的回调函数集合
function resolve(value) {
if (self.status === 'pending') { // 只有在pending状态下才能改变Promise状态
self.status = 'fulfilled';
self.value = value;
self.onResolvedCallbacks.forEach(function (fn) { fn(self.value); }); // 执行所有resolve回调函数
}
}
function reject(reason) {
if (self.status === 'pending') { // 只有在pending状态下才能改变Promise状态
self.status = 'rejected';
self.reason = reason;
self.onRejectedCallbacks.forEach(function (fn) { fn(self.reason); }); // 执行所有reject回调函数
}
}
try {
executor(resolve, reject); // 执行executor函数
} catch (error) {
reject(error); // 执行executor函数出错时,Promise被拒绝
}
}
MyPromise.prototype.then = function (onFulfilled, onRejected) {
onFulfilled = typeof onFulfilled === 'function' ? onFulfilled : function (value) { return value; };
onRejected = typeof onRejected === 'function' ? onRejected : function (reason) { throw reason; };
var self = this;
var promise2;
if (self.status === 'fulfilled') {
promise2 = new MyPromise(function (resolve, reject) {
setTimeout(function () { // 确保异步执行
try {
var x = onFulfilled(self.value);
resolvePromise(promise2, x, resolve, reject); // 处理返回值,并根据返回值执行resolve或reject
} catch (error) {
reject(error);
}
});
});
} else if (self.status === 'rejected') {
promise2 = new MyPromise(function (resolve, reject) {
setTimeout(function () { // 确保异步执行
try {
var x = onRejected(self.reason);
resolvePromise(promise2, x, resolve, reject); // 处理返回值,并根据返回值执行resolve或reject
} catch (error) {
reject(error);
}
});
});
} else if (self.status === 'pending') {
promise2 = new MyPromise(function (resolve, reject) {
self.onResolvedCallbacks.push(function (value) { // 将resolve回调函数存储起来
setTimeout(function () { // 确保异步执行
try {
var x = onFulfilled(value);
resolvePromise(promise2, x, resolve, reject); // 处理返回值,并根据返回值执行resolve或reject
} catch (error) {
reject(error);
}
});
});
self.onRejectedCallbacks.push(function (reason) { // 将reject回调函数存储起来
setTimeout(function () { // 确保异步执行
try {
var x = onRejected(reason);
resolvePromise(promise2, x, resolve, reject); // 处理返回值,并根据返回值执行resolve或reject
} catch (error) {
reject(error);
}
});
});
});
}
return promise2;
};
// 处理Promise的返回值,根据返回值执行resolve或reject
function resolvePromise(promise2, x, resolve, reject) {
if (promise2 === x) { // 如果promise2和x是同一个对象,则抛出TypeError
reject(new TypeError('Chaining cycle detected for promise'));
}
var called = false; // 防止多次调用resolve或reject
if (x instanceof MyPromise) { // 如果x是一个Promise对象
if (x.status === 'pending') { // 如果x处于pending状态,则等待x状态改变后再执行resolve或reject
x.then(function (value) { resolvePromise(promise2, value, resolve, reject); }, reject);
} else { // 如果x已经处于fulfilled或rejected状态,则直接执行resolve或reject
x.then(resolve, reject);
}
}
```
# 类的写法
```js
class MyPromise {
constructor(executor) {
this.status = 'pending';
this.value = undefined;
this.reason = undefined;
this.onResolvedCallbacks = [];
this.onRejectedCallbacks = [];
const resolve = (value) => {
if (this.status === 'pending') {
this.status = 'fulfilled';
this.value = value;
this.onResolvedCallbacks.forEach((fn) => fn(this.value));
}
};
const reject = (reason) => {
if (this.status === 'pending') {
this.status = 'rejected';
this.reason = reason;
this.onRejectedCallbacks.forEach((fn) => fn(this.reason));
}
};
try {
executor(resolve, reject);
} catch (error) {
reject(error);
}
}
then(onFulfilled, onRejected) {
onFulfilled = typeof onFulfilled === 'function' ? onFulfilled : (value) => value;
onRejected = typeof onRejected === 'function' ? onRejected : (reason) => { throw reason; };
const promise2 = new MyPromise((resolve, reject) => {
if (this.status === 'fulfilled') {
setTimeout(() => {
try {
const x = onFulfilled(this.value);
resolvePromise(promise2, x, resolve, reject);
} catch (error) {
reject(error);
}
});
} else if (this.status === 'rejected') {
setTimeout(() => {
try {
const x = onRejected(this.reason);
resolvePromise(promise2, x, resolve, reject);
} catch (error) {
reject(error);
}
});
} else if (this.status === 'pending') {
this.onResolvedCallbacks.push((value) => {
setTimeout(() => {
try {
const x = onFulfilled(value);
resolvePromise(promise2, x, resolve, reject);
} catch (error) {
reject(error);
}
});
});
this.onRejectedCallbacks.push((reason) => {
setTimeout(() => {
try {
const x = onRejected(reason);
resolvePromise(promise2, x, resolve, reject);
} catch (error) {
reject(error);
}
});
});
}
});
return promise2;
}
}
function resolvePromise(promise2, x, resolve, reject) {
if (promise2 === x) {
return reject(new TypeError('Chaining cycle detected for promise'));
}
let called = false;
if (x instanceof MyPromise) {
if (x.status === 'pending') {
x.then((value) => resolvePromise(promise2, value, resolve, reject), reject);
} else {
x.then(resolve, reject);
}
} else if (x !== null && (typeof x === 'object' || typeof x === 'function')) {
try {
const then = x.then;
if (typeof then === 'function') {
then.call(x, (value) => {
if (called) return;
called = true;
resolvePromise(promise2, value, resolve, reject);
}, (reason) => {
if (called) return;
called = true;
reject(reason);
});
} else {
resolve(x);
}
} catch (error) {
if (called) return;
called = true;
reject(error);
}
} else {
resolve(x);
}
}
```
测试一下
```js
// 成功的Promise
const p1 = new myPromise((resolve,reject)=>{
setTimeout(()=>{
resolve(111)
},500)
}).then((res)=>{
console.log(res) // result
})
```
```js
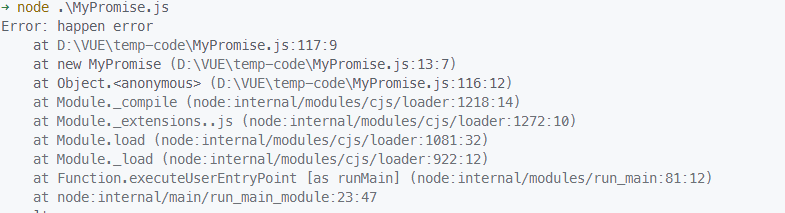
// 失败的Promise
const p2 = new MyPromise((resolve,reject)=>{
throw new Error('happen error')
}).then(()=>{},(e)=>{
console.log(e) //Error: happen error
})
```
2023 年 2 月 10 日 10:23# promise
阅读全文⇢